This post may contain affiliate links. Please read my disclaimer.
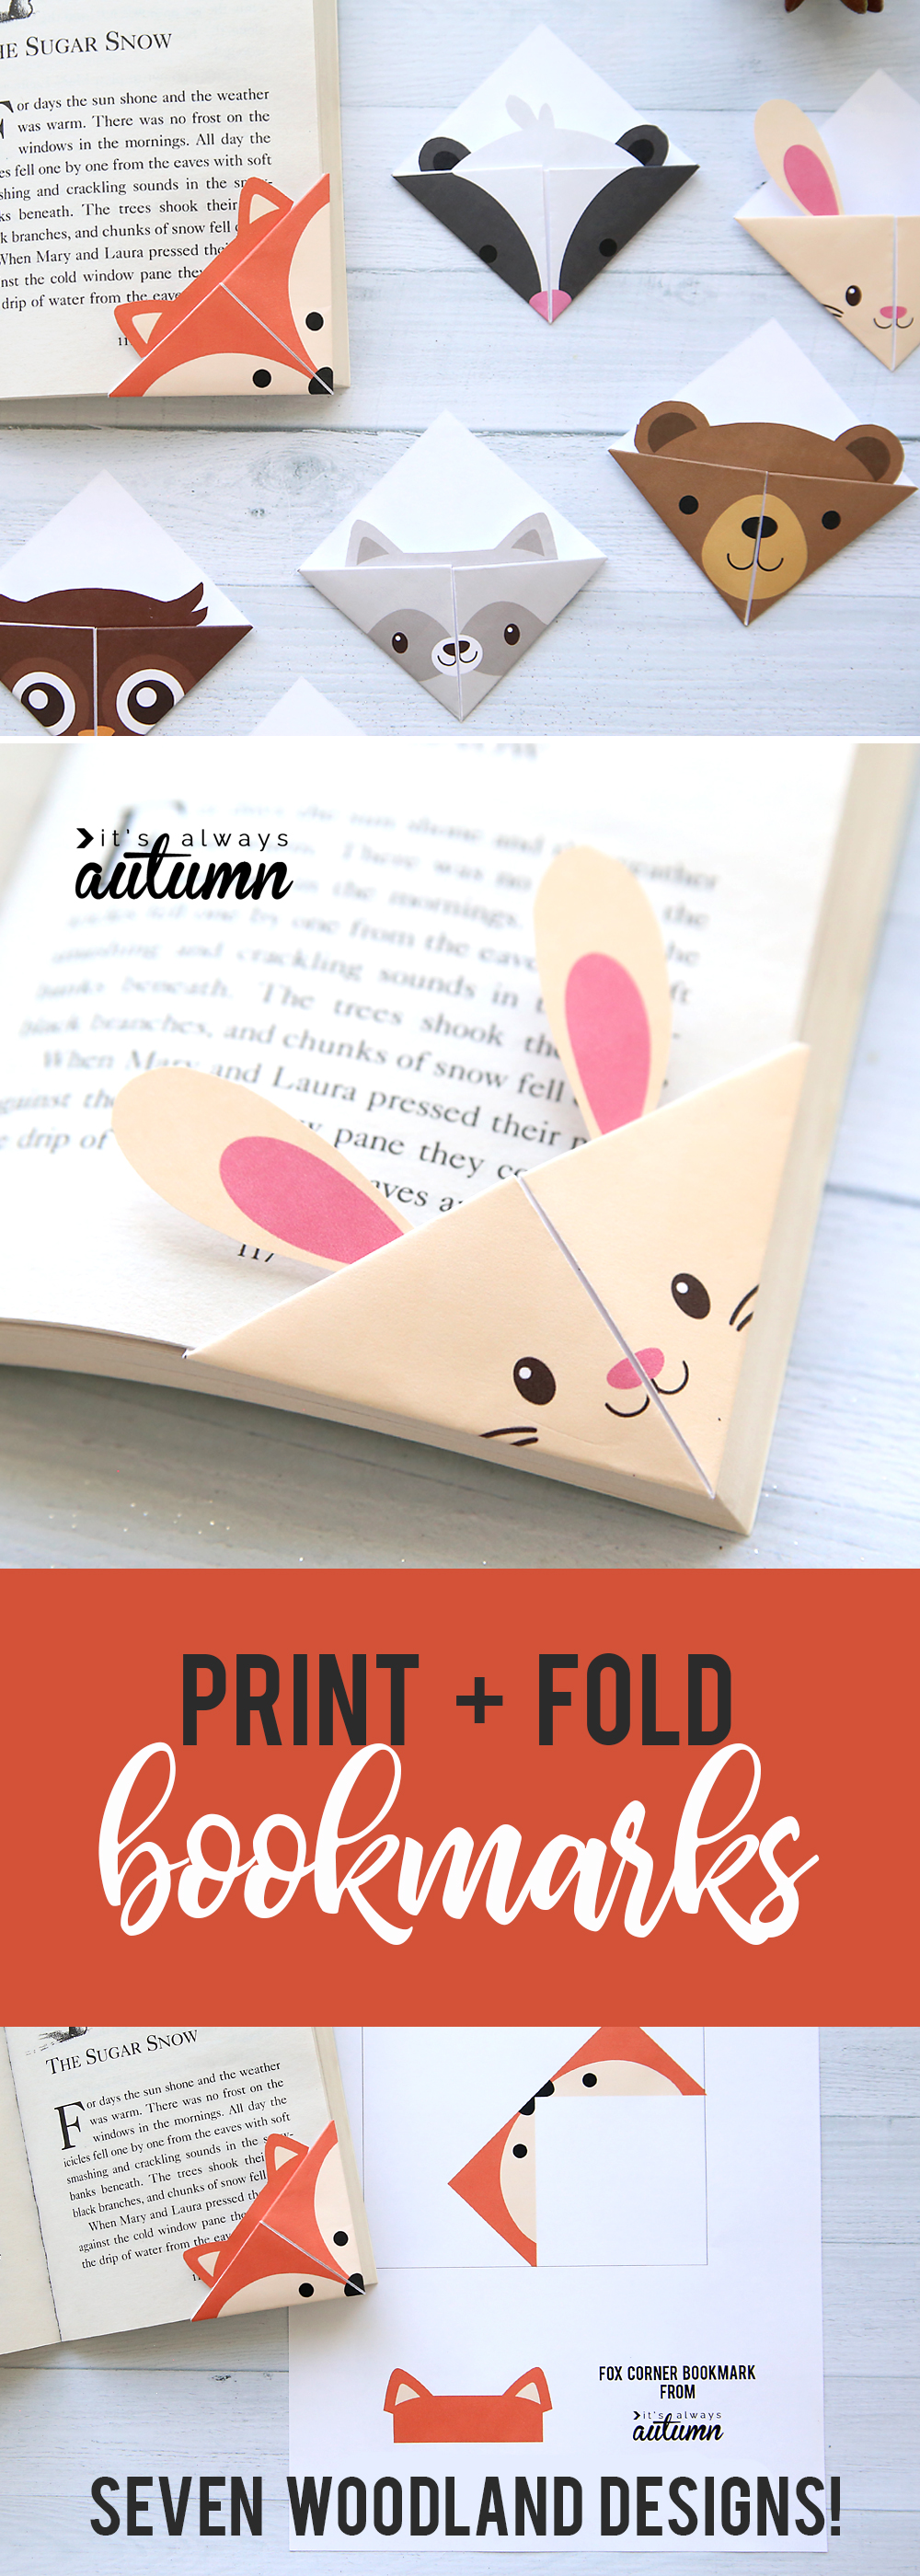
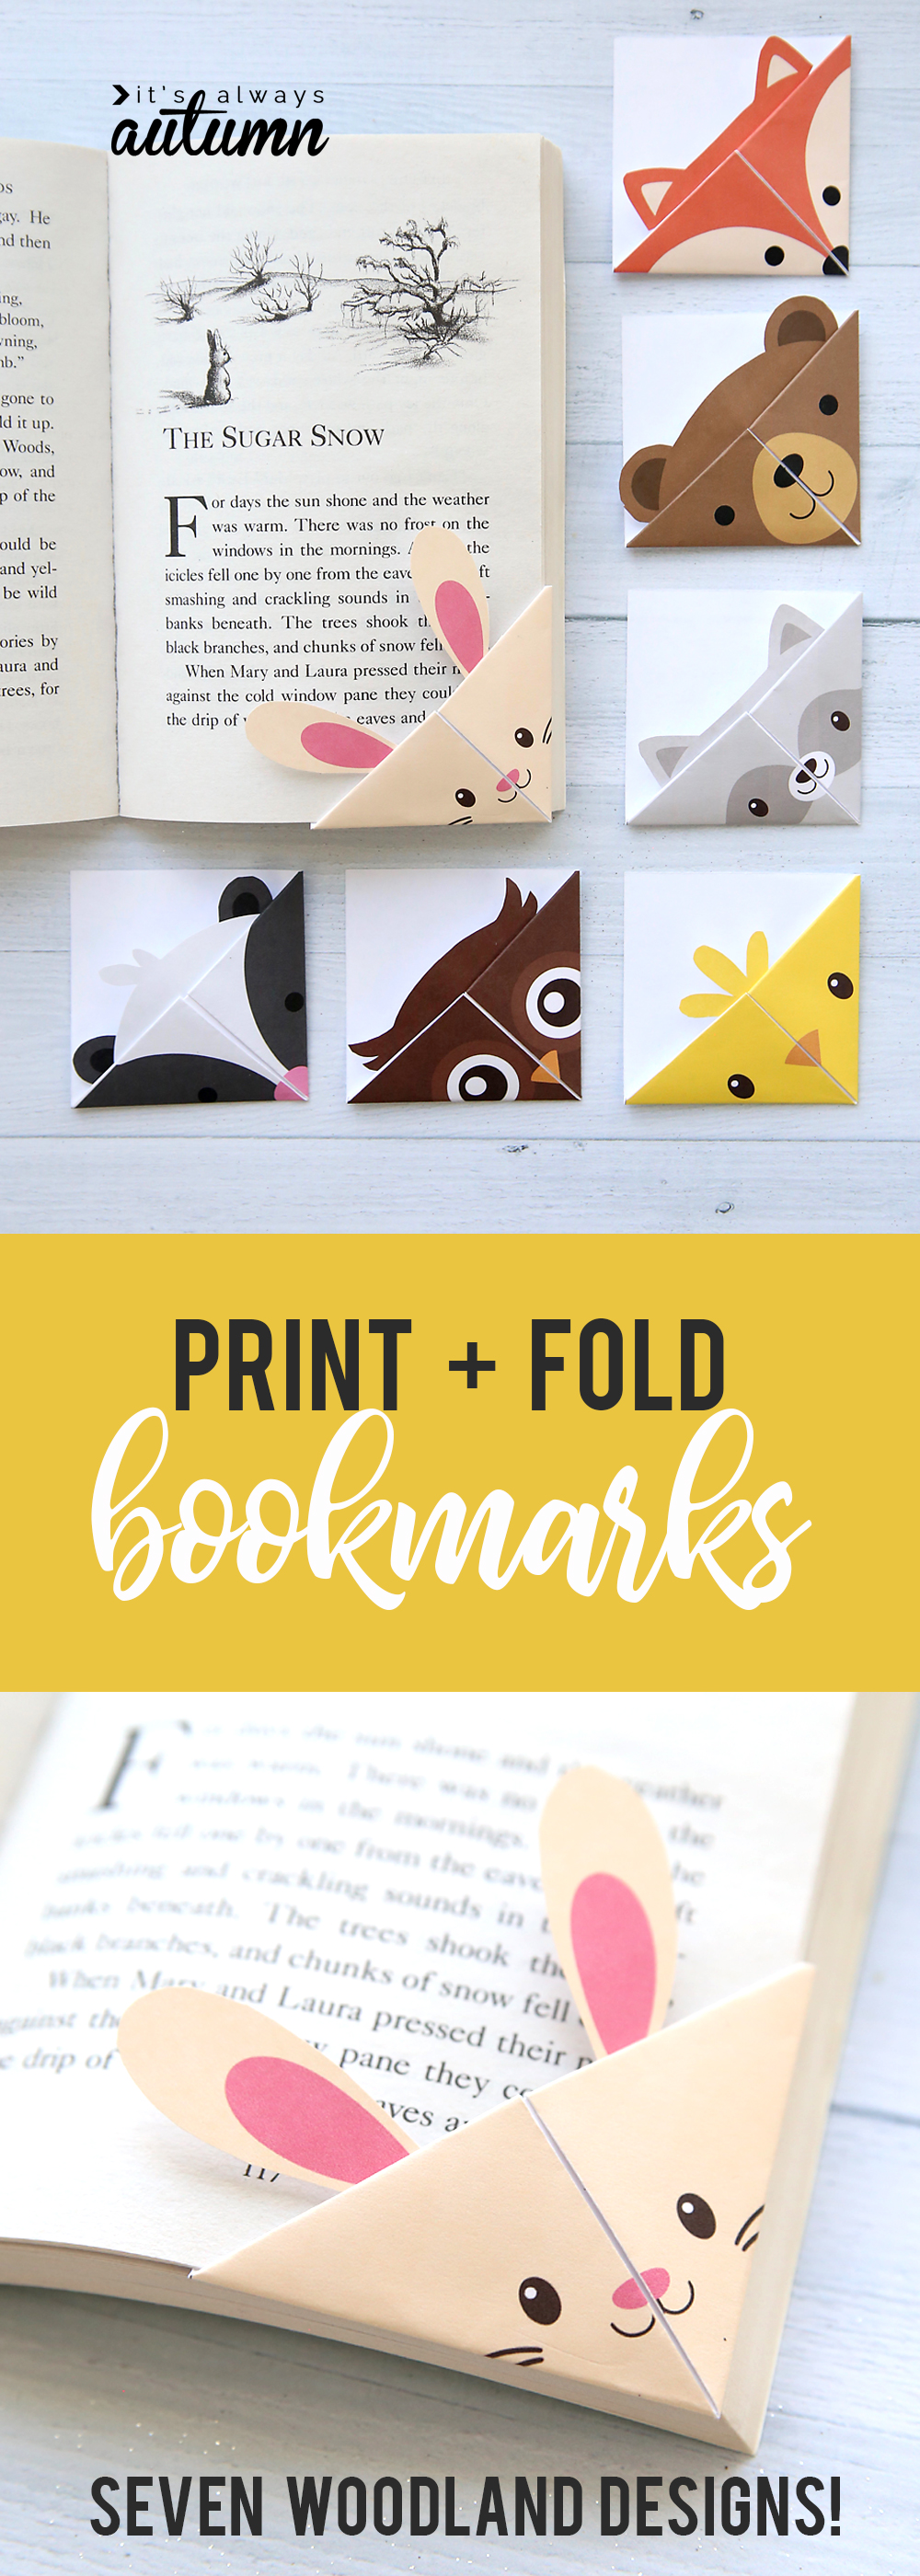
These woodland animal origami bookmarks are adorable! Learn how to make a DIY bookmark out of one piece of paper with seven free printable origami templates.
I don’t know if I’ve ever mentioned this, but I am a book mutilator. Yep, that’s right, I turn down the corners of pages to mark my place, and the college I attended considered this “book mutilation.” You could even get fined for it! Well, if that didn’t teach me to start using bookmarks it’s likely nothing will, but at least my children haven’t inherited my criminal ways. One of my younger kids recently taught me how to fold origami bookmarks which slide over the corner of the page you are on to save your place. He even drew eyes and teeth on his corner bookmarks to turn them into little monsters.
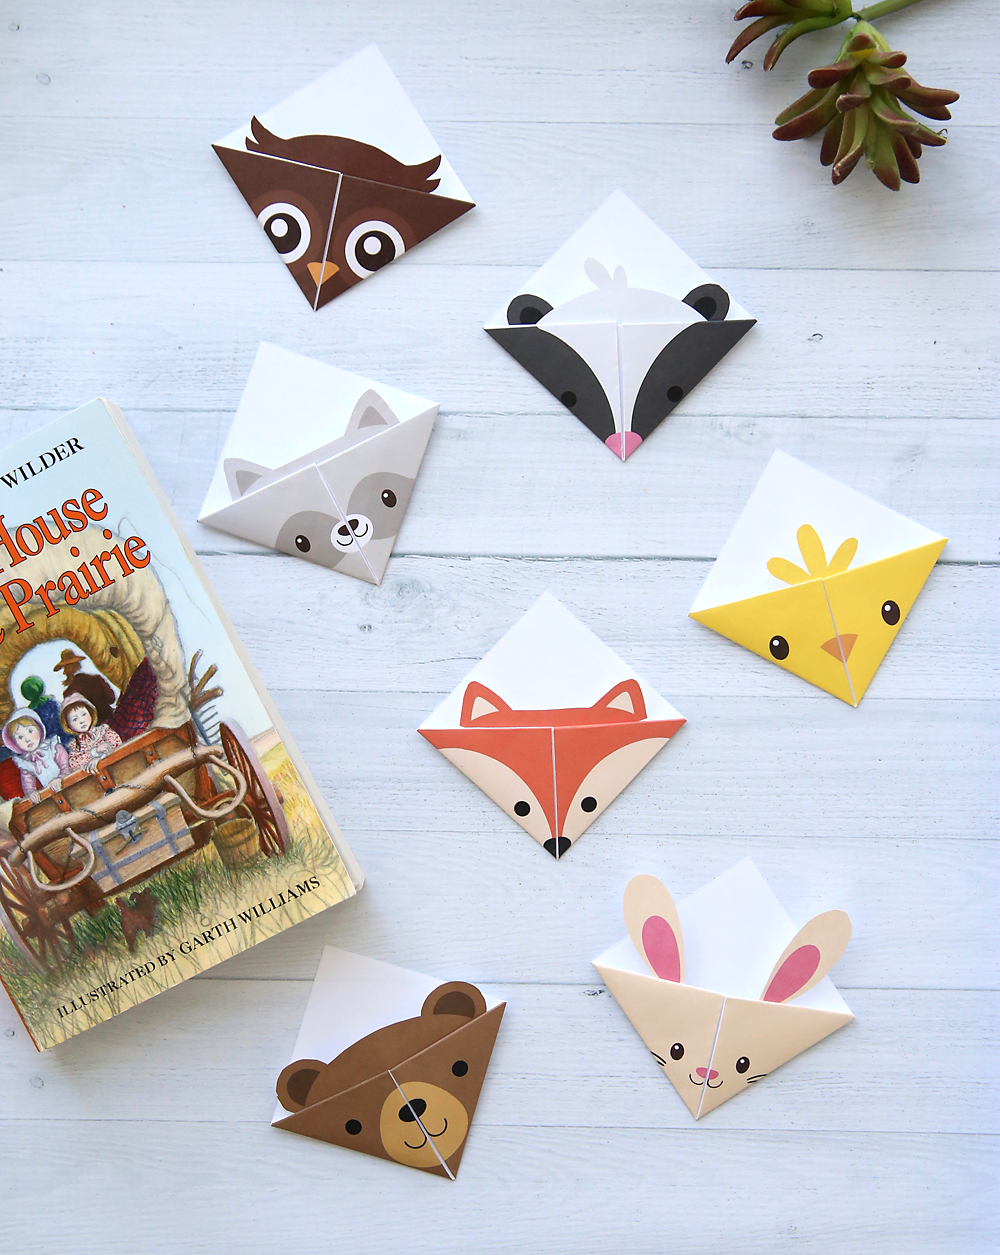
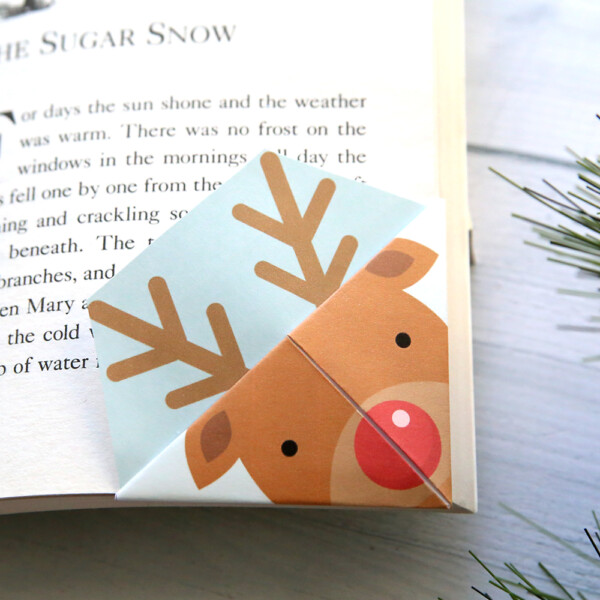
I figured it would be fun to turn origami bookmarks into little woodland animals. So I’ve created seven different printable templates you guys can use to make cute origami bookmarks with your kids. Aren’t they adorable?
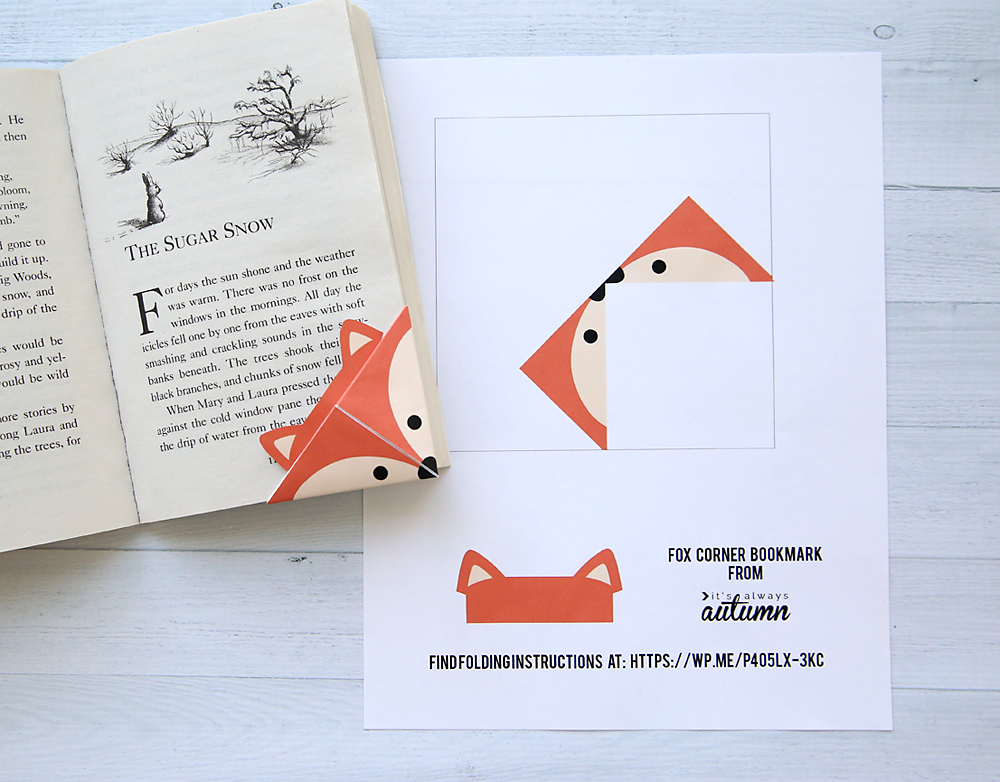
All you have to do is print out the one you like best and cut out the square and the ears. A few folds later you have an adorable DIY origami bookmark that will help keep you from a life of book mutilation.
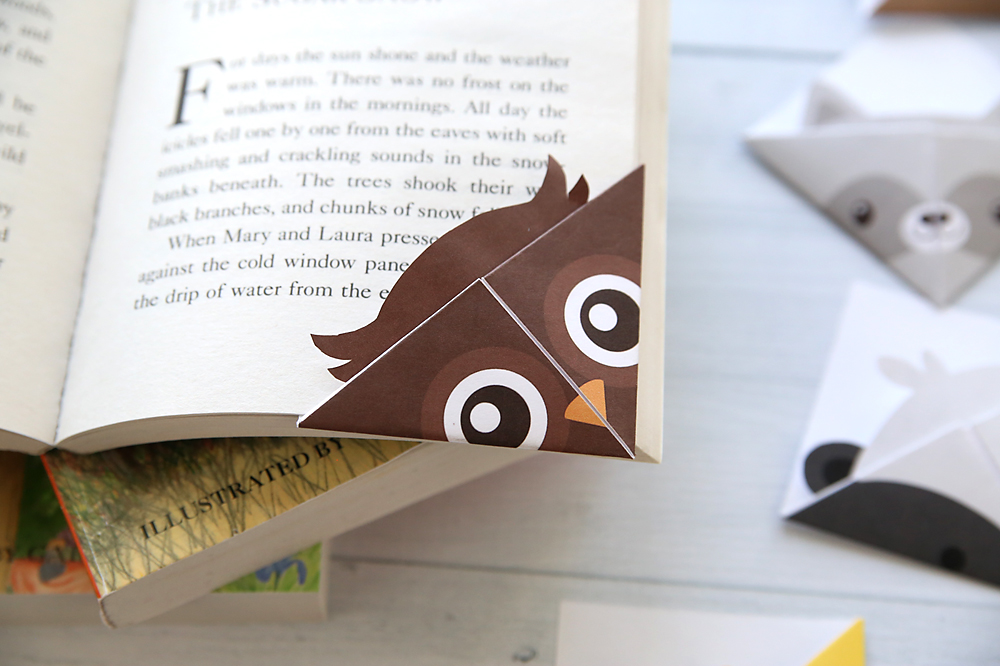
 bookmark in a book" width="1000" height="782" />
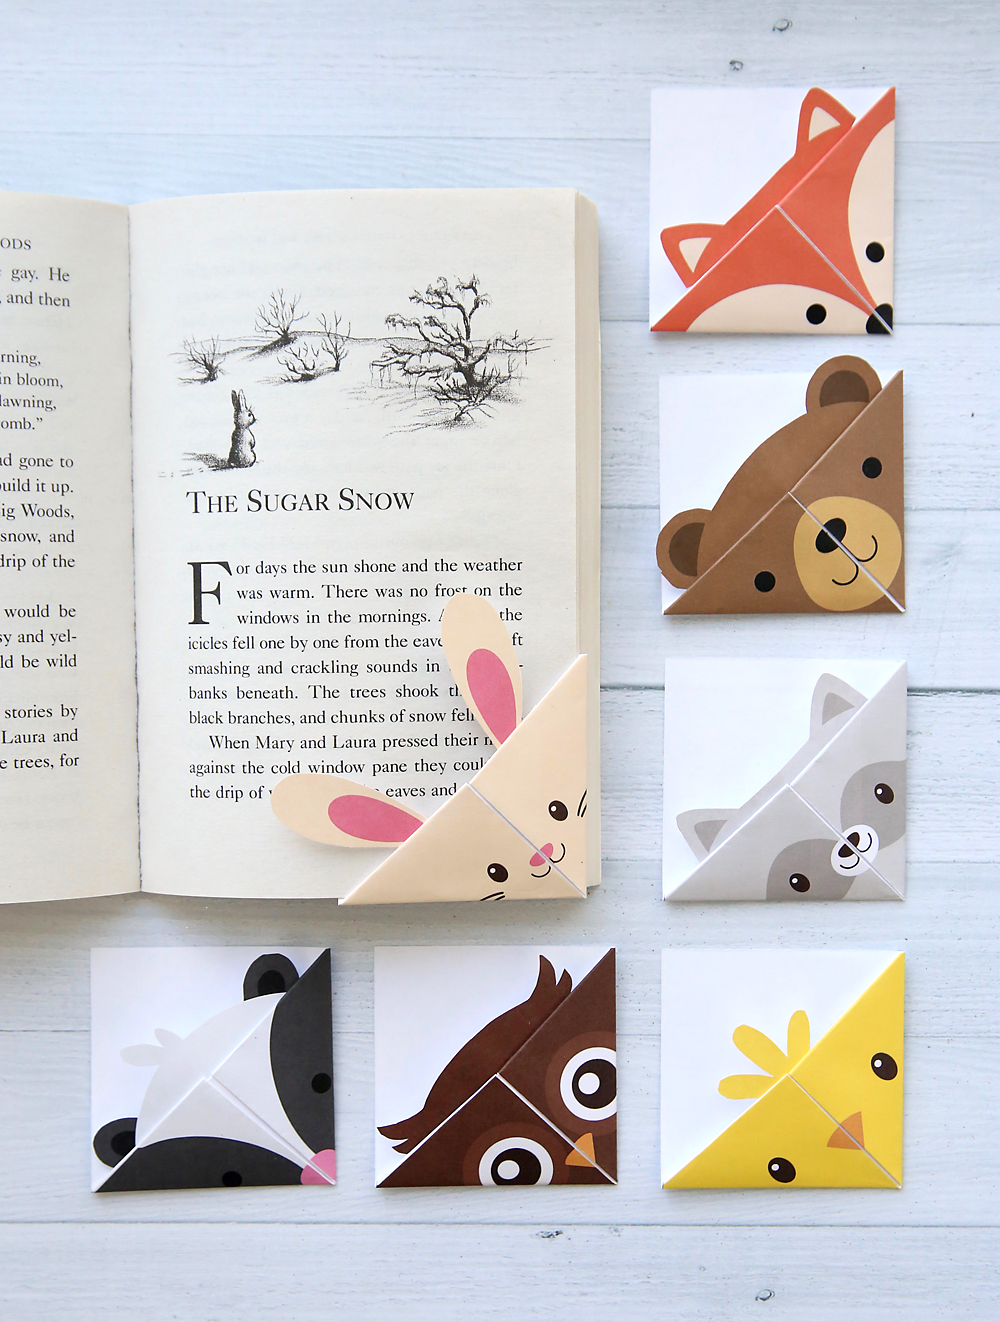
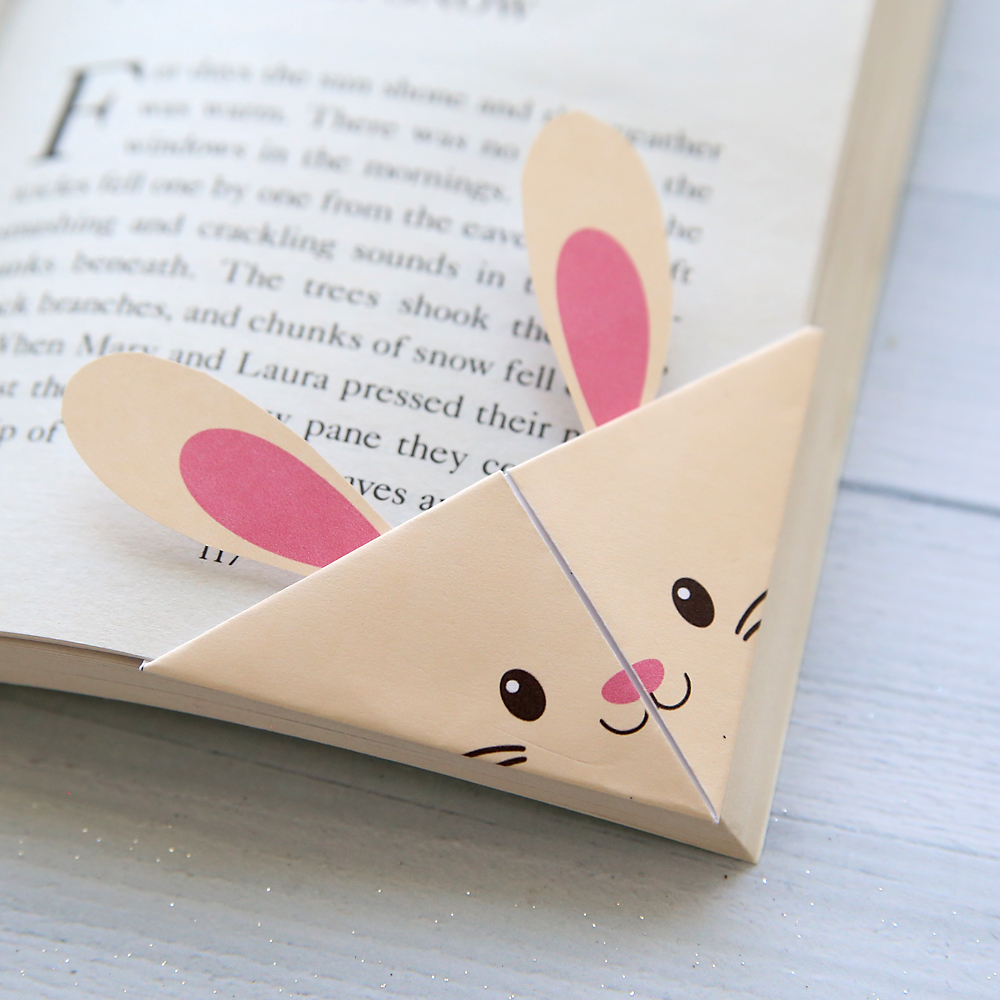
My daughter loves the bunny…
…while my son thinks the owl is the cutest:
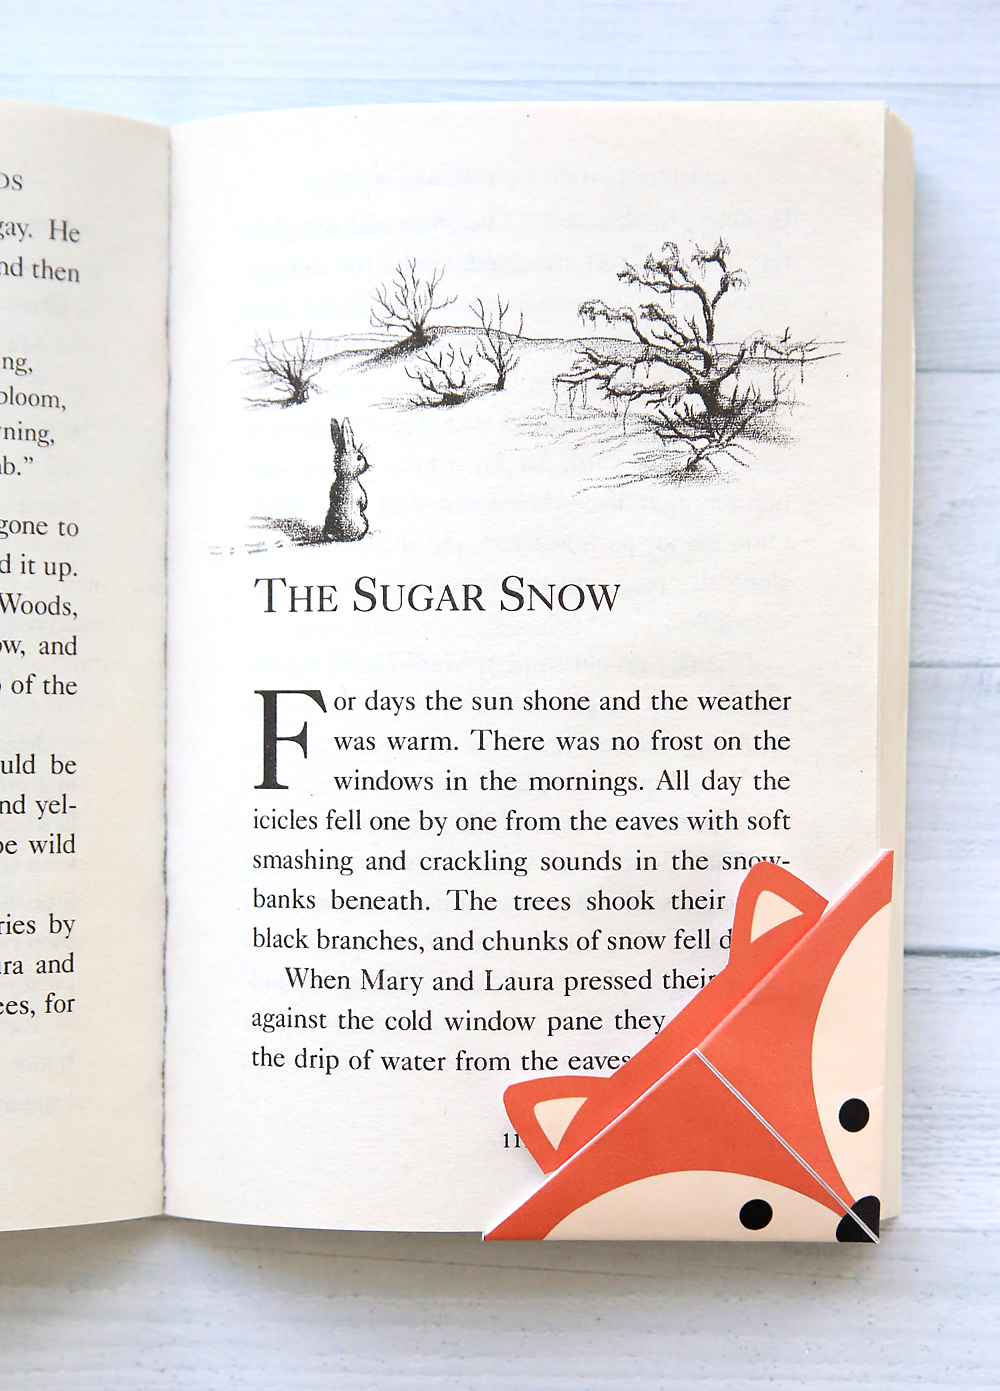
I’m partial to the fox, but that little skunk! He’s pretty cute too.
Since I possess pretty much no artistic ability, these bookmarks were created with permission using woodland animal clipart from two Etsy stores: ClipArtisan and MyCuteLobsterDesigns. Check them out if you need some adorable clipart for your projects!
As with all my printables, these are offered for personal use ONLY and may not be redistributed. Please refer friends to this blog post to print their own folded bookmark templates.
Watch this video to see how to fold these DIY bookmarks (written instructions follow):
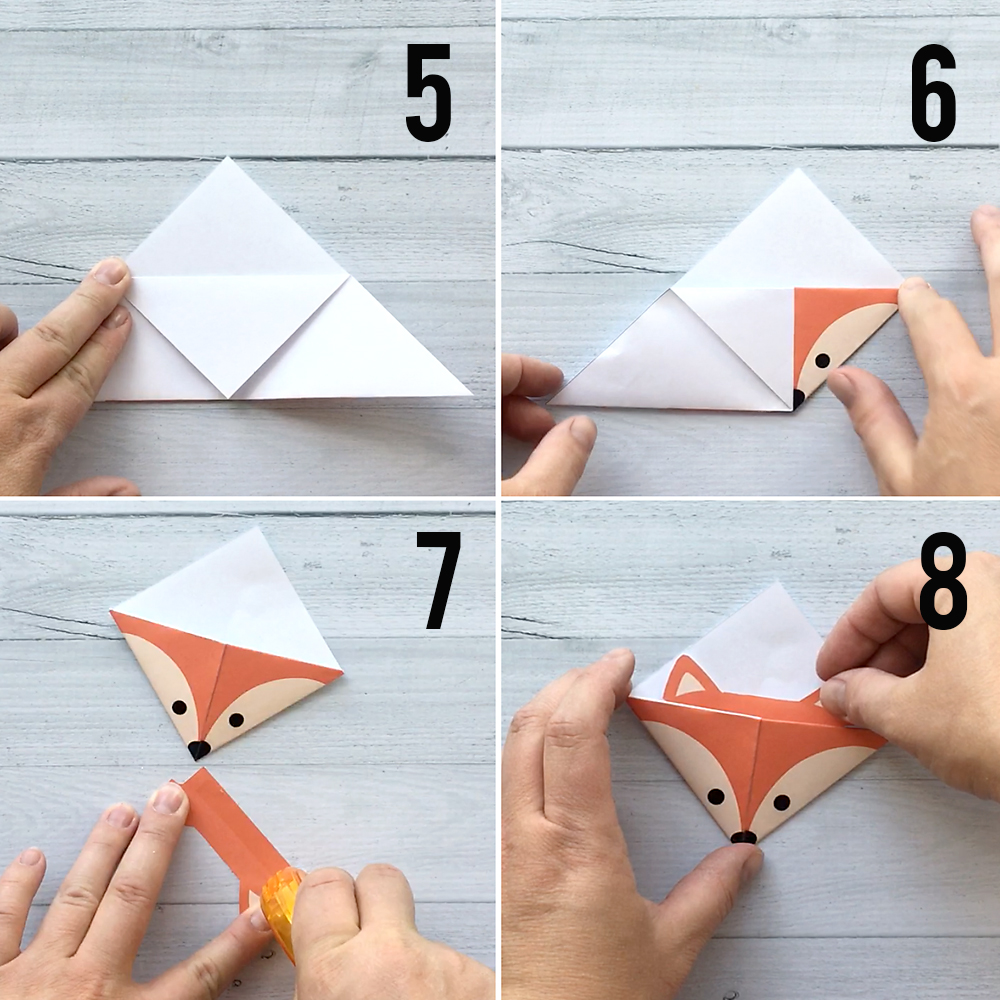
1 – Print bookmark template on plain white printer paper. Trim along lines to cut out the square. 2 – Fold square in half diagonally to create a triangle. Both colored areas should show on the top of the triangle. 3 – Flip the triangle over. 4 – Fold each outer corner of the triangle to meet together at the top of the triangle and form a face. When doing this, make sure the two sides of the face line up. Press along all the folds to crease.
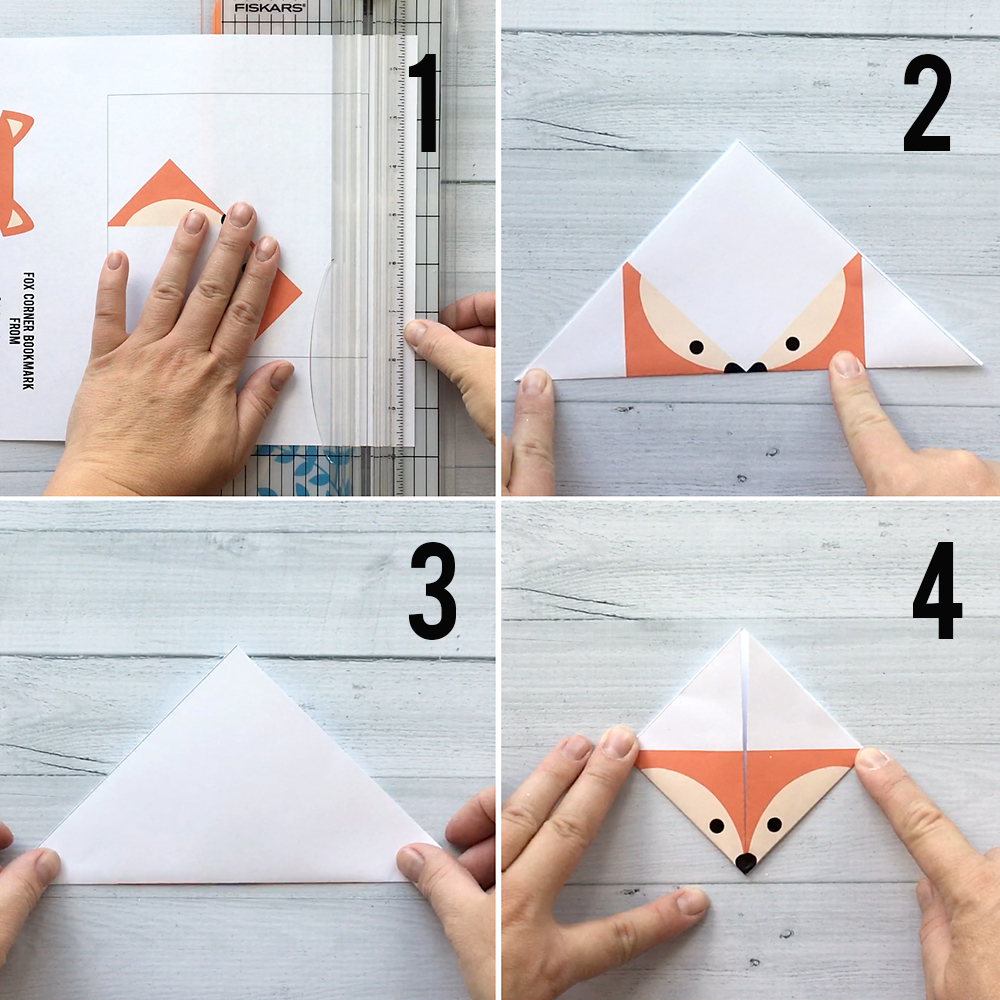
5 – Open up the last fold you did so you are back to the original triangle. Fold the top point of the triangle down, using only the *top* layer of paper. 6 – Fold one corner back up and tuck it into the “pocket” created in the last step. Repeat with the other corner. 7 – Cut out the ears and add adhesive along the straight edge. 8 – Tuck the ears inside the pocket to complete the bookmark.
One DIY origami bookmark complete! Now go ahead and print out all the other versions so your woodland animals can have some friends.
A few last notes:
Looking for more bookish fun? Try these posts:
And if you love origami, visit these posts:
Hello there! I’m a busy mom of five who loves to make things. Crafts, recipes, sewing, holiday projects: I’ve tried them all, and you can too! I love EASY projects anyone can make.


Thank you for sharing ❤❤❤. I’ll fold it and give it to the children at the Children’s Foundation. I believe that the children will be very happy.